Lessons From Illine – Creating a Stylized PBR Environment in Unity URP
I started Illine to learn open-world design the hard way: Building an environment, running into problems, and figuring out how to solve them. In the end, I did not finish the environment with all of its intended biomes before retiring the project (see Wrapping Up below), but I learned an immense amount. This article is a compilation of lessons learned.
Special shoutout to Yorai Omer for being my mentor on open world design, BroadestOfSwords for always having GIFs demonstrating how games do things, and the TVE Discord for the help of its professional community. However, I must give a disclaimer: Everything mentioned in this article was my decision and the solutions presented here are not representative of anyone’s advice.
Asset List
Illine is a combination of kit-bashed asset packs and custom graphics. Here is the full list of assets I used.
Performance Tools
- Amplify Imposters
- The Vegetation Engine | Amplify Imposters Module
- Vegetation Studio Pro
- CTS 2019 – Complete Terrain Shader (deprecated)
- Mesh Baker
- Shader Control
Atmosphere
- Azure[Sky] Dynamic Skybox
- Horizon Based Ambient Occlusion
- Massive Clouds Atmos – Volumetric Skybox
- Physically Based Auto Depth of Field
- URP TAA
- Volumetric Fog & Mist 2
- Volumetric Lights
- Wind Trails Effect
Environment Assets
- Asia – Far East Environment
- Asian Buildings Collection
- AZURE Nature
- Crest Ocean System URP
- Fantasy Adventure Environment
- Japanese Village Kit
- The Illustrated Nature
- Open World Nature Kit
- PBR Clean Concrete Textures
- Pure Nature
- Rock and Boulders 3
- Stylized Grass Shader
- The Vegetation Engine
- Velvara Flames
Character & Controller
- Character Movement Fundamentals
- Cinemachine
- GhostLadyS2: Templar Knight
- Human Shader Pack
- Final IK
- MagicaCloth
Utility
- Advanced FPS Counter
- Amplify Shader Editor
- DOTween Pro
- Landscaper
- Prefab Painter 2
- Technie Collider Creator
- Ultimate Screenshot Creator
Custom-Made
Paper Plan & References
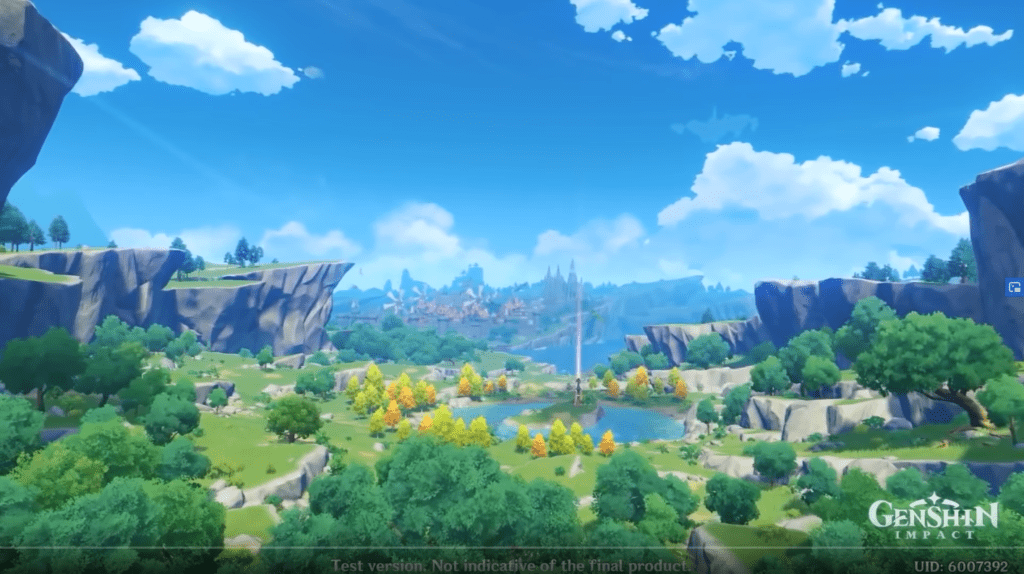
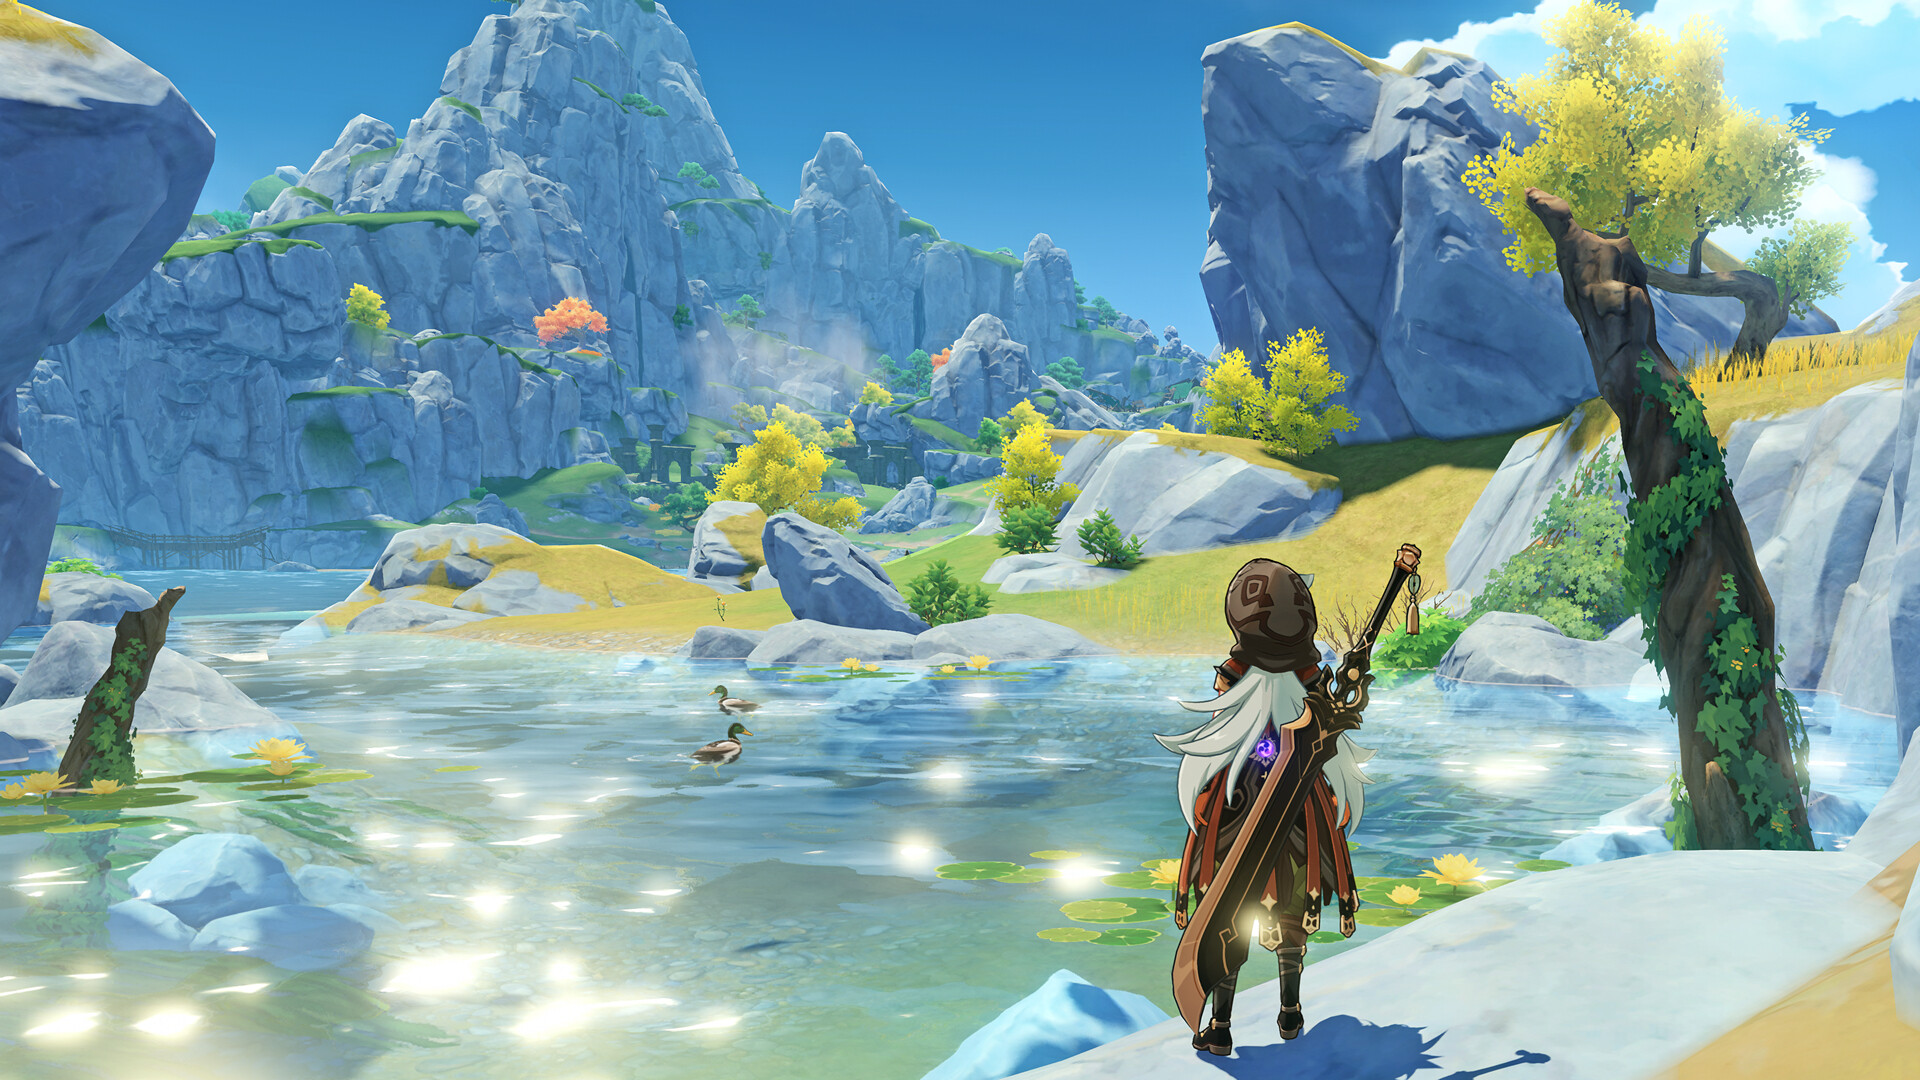
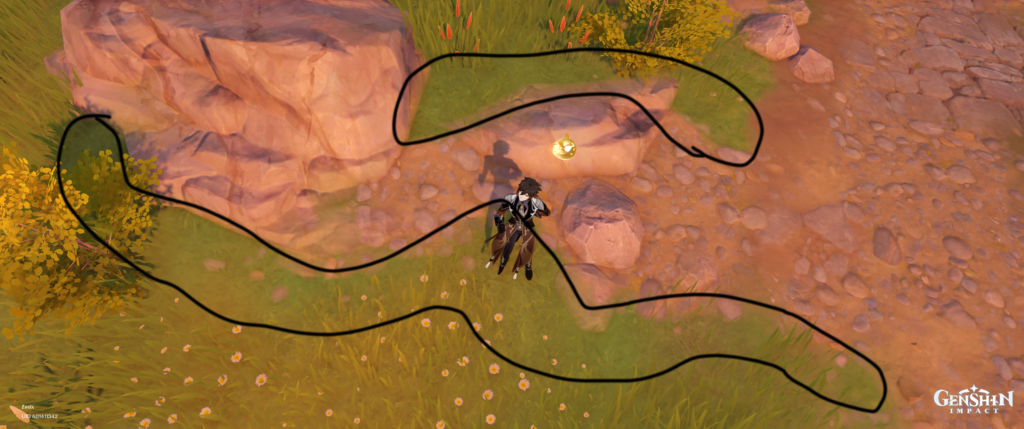
Genshin Impact was my reference, though it had not released in the US at the time I started Illine, so I relied on YouTube footage to prepare the art style breakdown.
The key characteristic of Genshin Impact‘s style is the use of saturated unnatural colors to create a vibrant fantasy atmosphere.
Some folks have called Genshin Impact a rip-off of Breath of the Wild, but there are notable differences between the two.
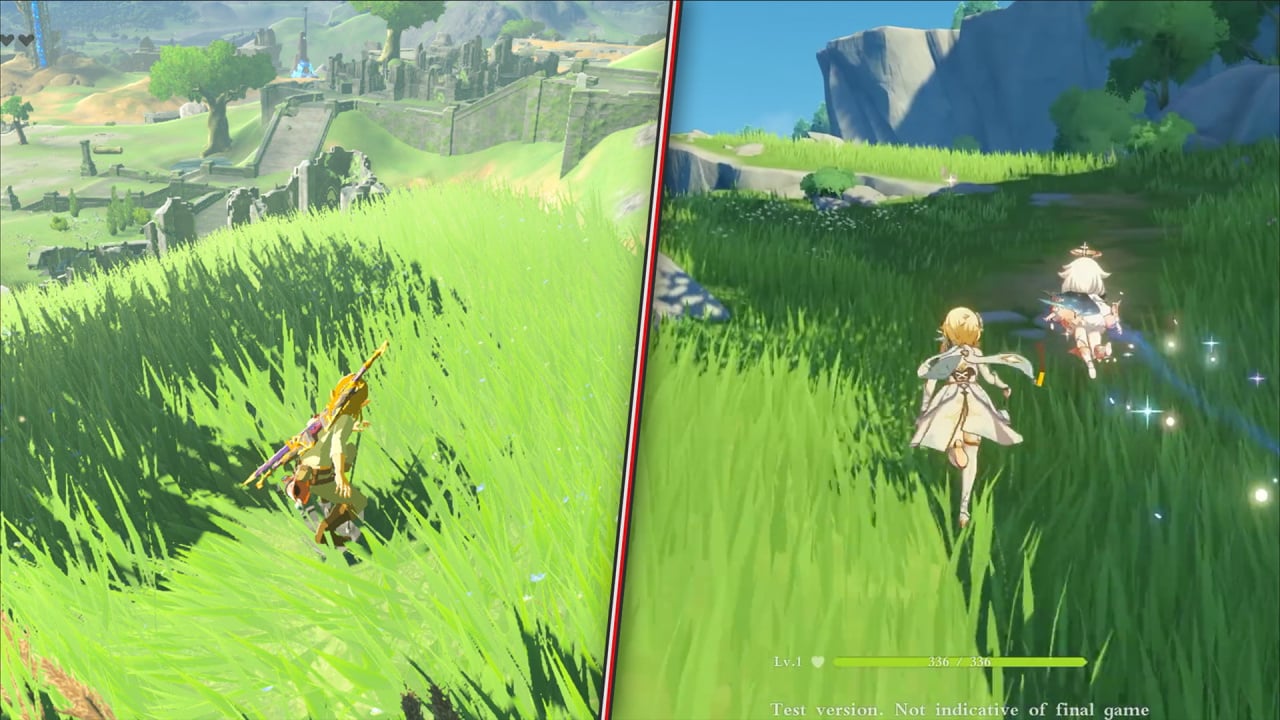
Breath of the Wild uses natural blends, with moss growing on the sides of rocks. Genshin Impact has more defined colors and contrast, using faked character shadowing and smooth rocks without any moss on sides, only on tops (most likely triplanar).
Another major difference is in how mountains and cliffs are formed. Breath of the Wild uses a mix of heightmap-based elevation and rock meshes, whereas every mountain and cliff in Genshin Impact is a rock mesh blended into the terrain.
Style Considerations
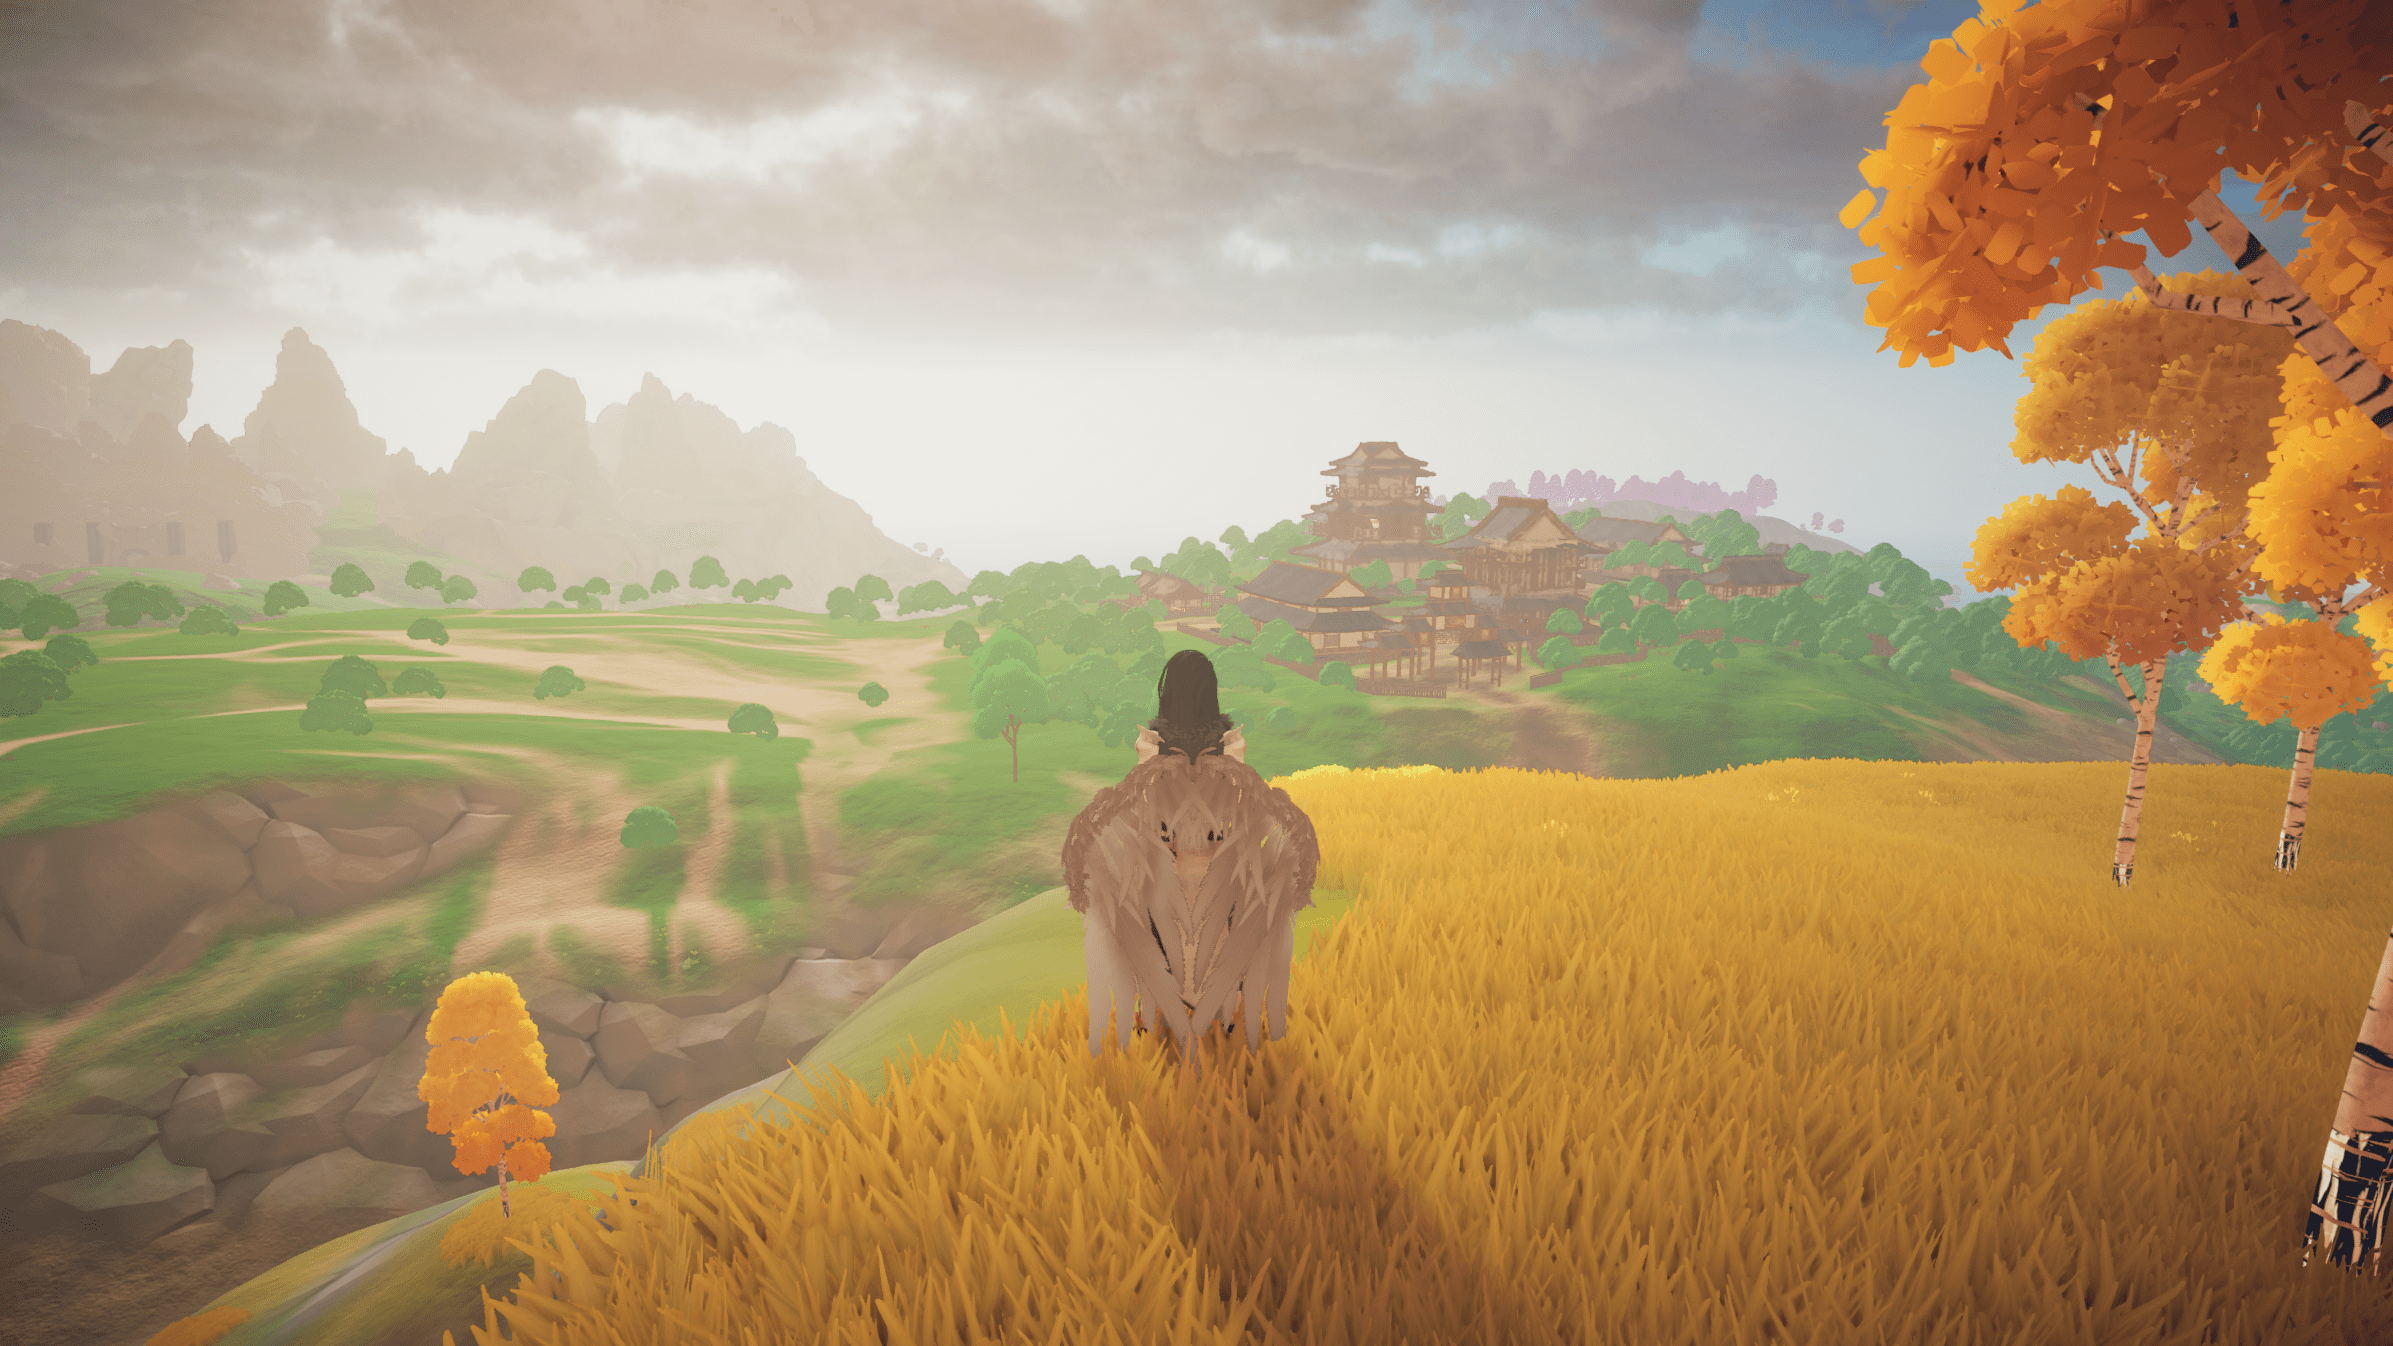
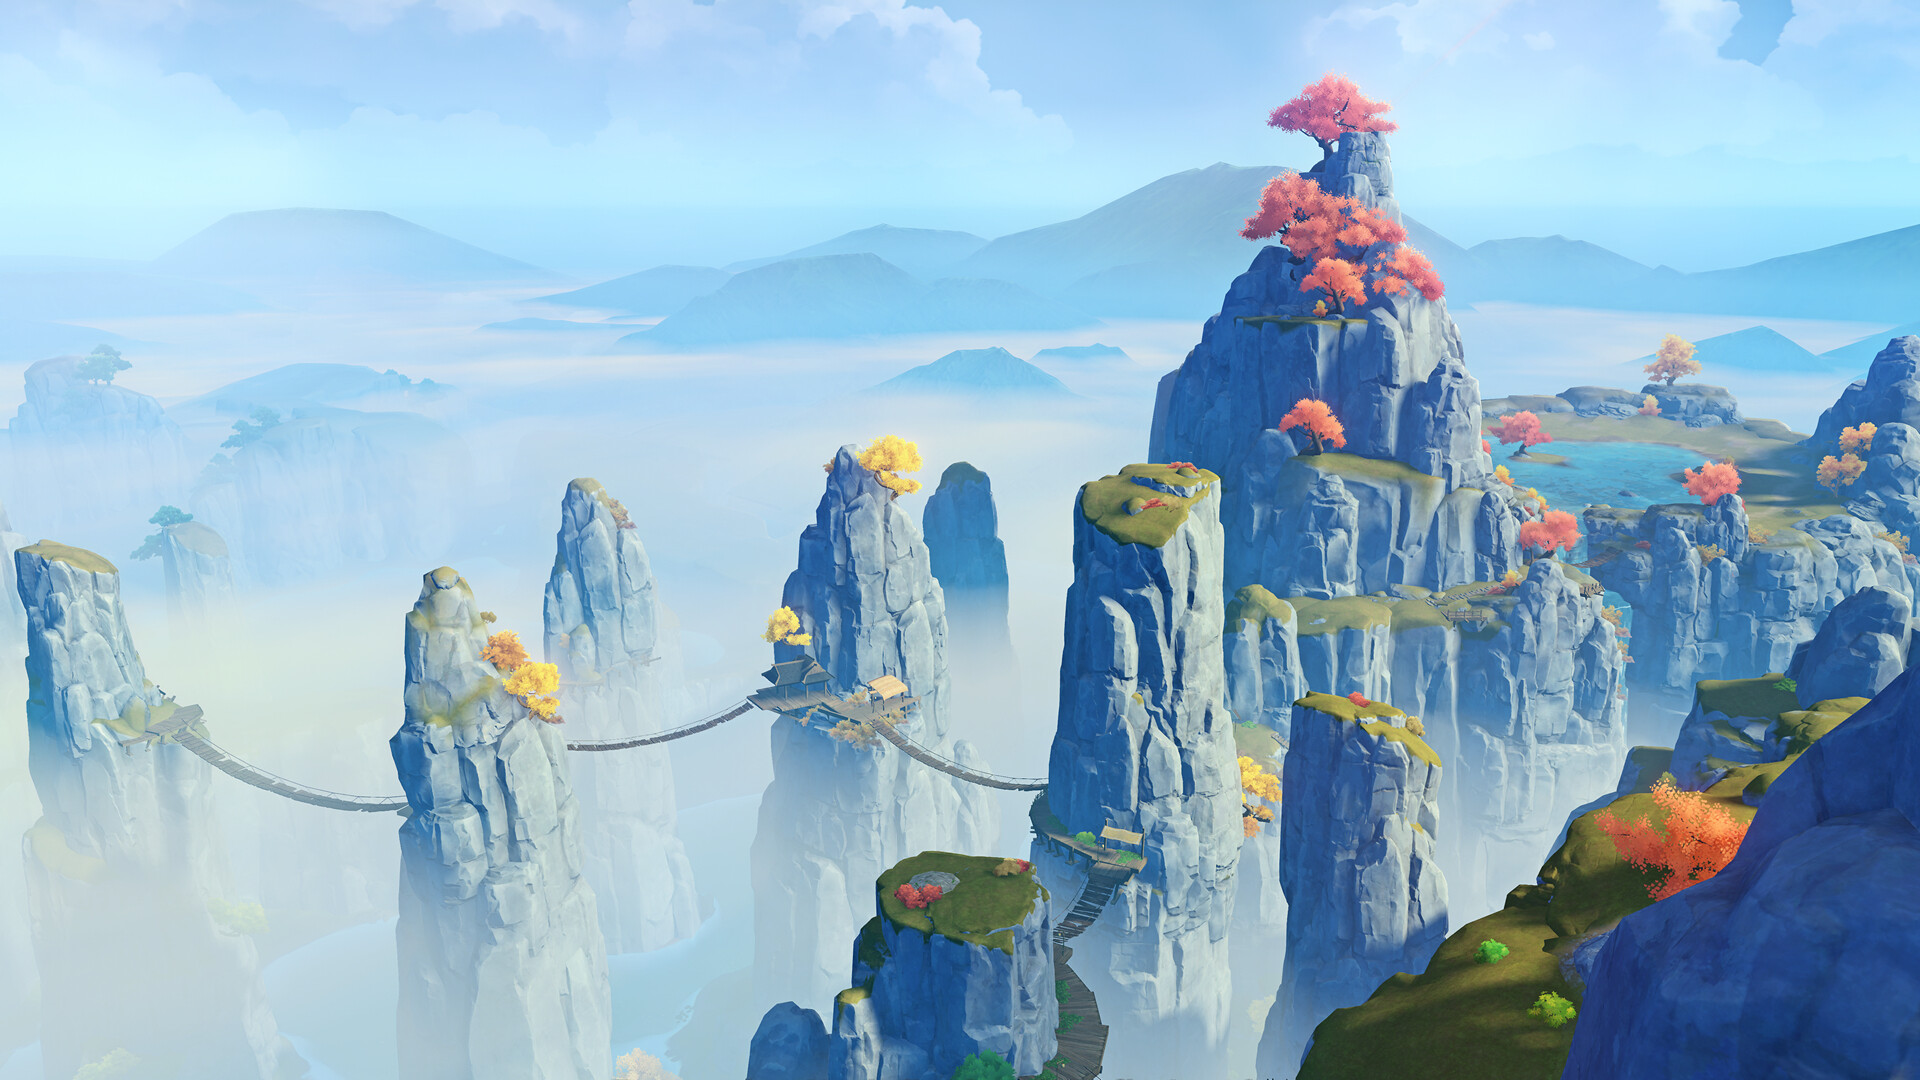
My goal was to create an environment inspired by the styles of Breath of the Wild and Genshin Impact, combining the terrain-based mountains and hills of the former with the exaggerated colorful vegetation of the latter. I decided to stay fully PBR for this project due to more personal experience with it.
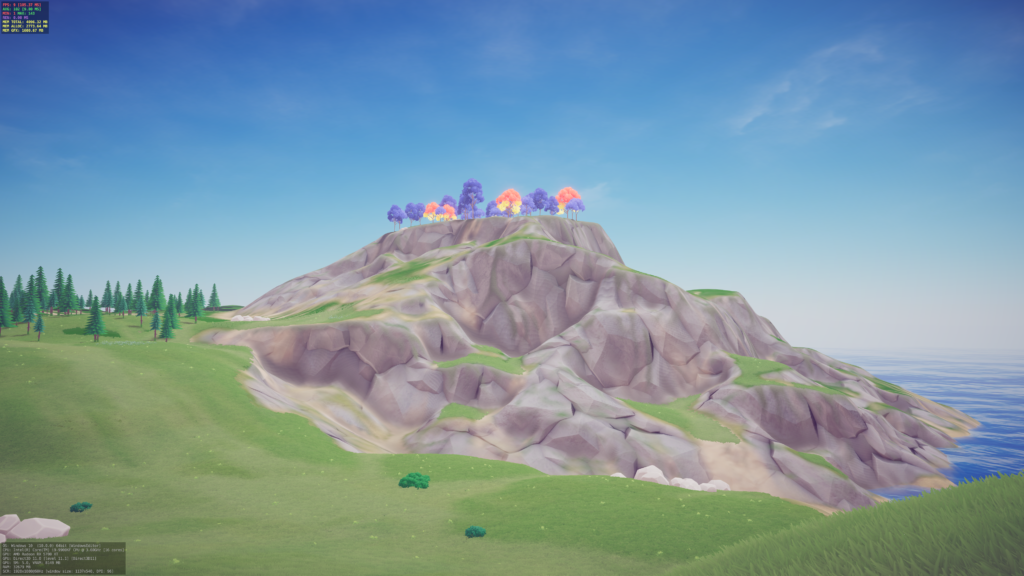
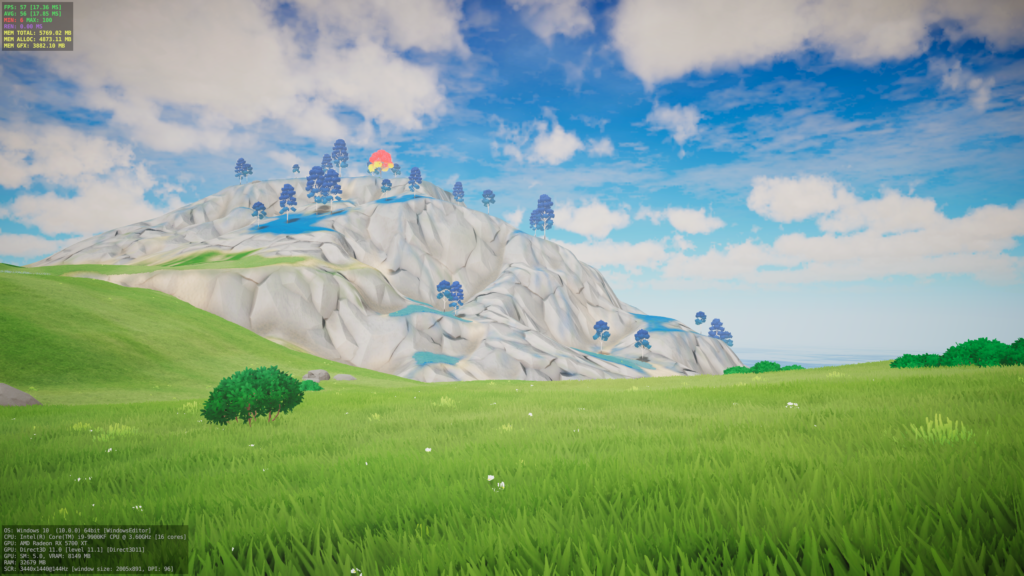
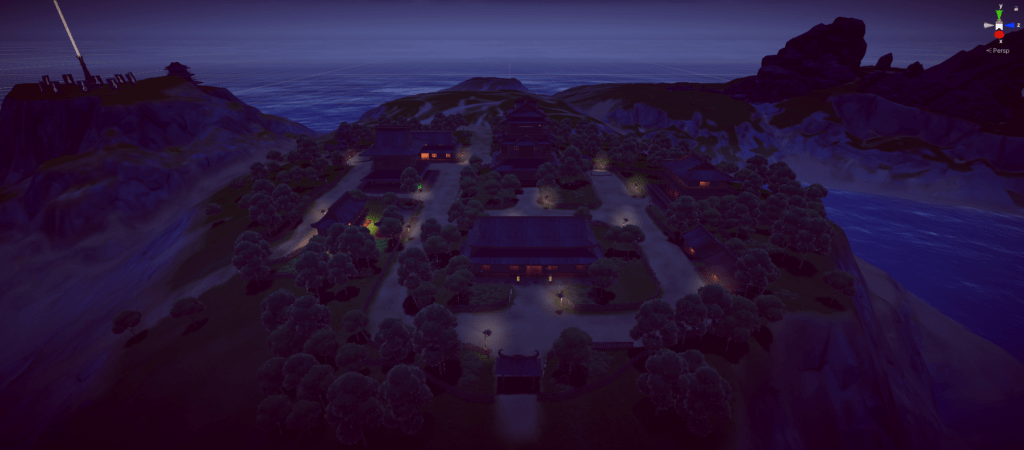
After creating the base terrain (see section below), my first priority was to create a test biome to serve as a style reference for the rest of the project. I spent two months iterating this reference biome until I felt happy with the art direction.
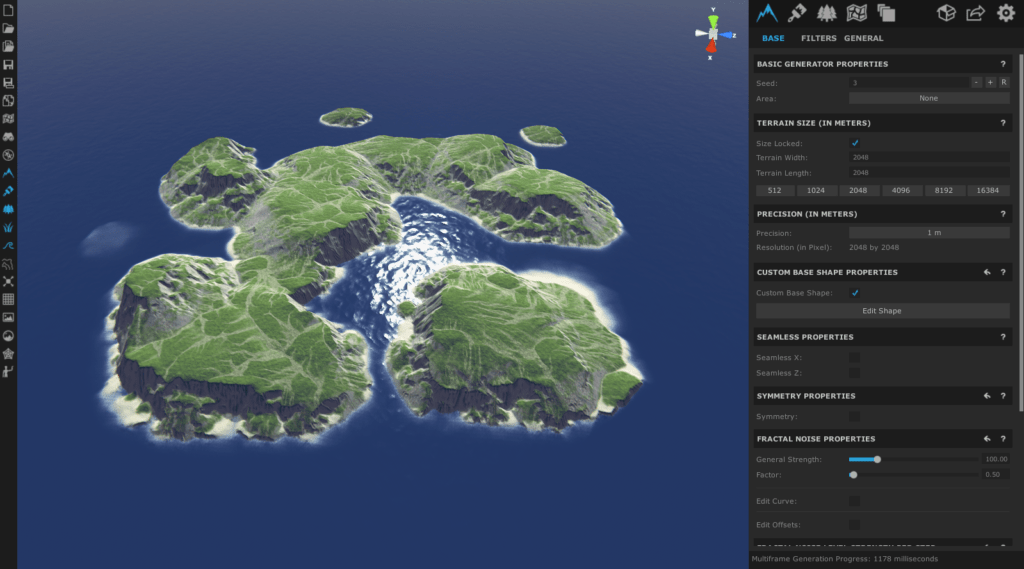
Base Terrain Creation
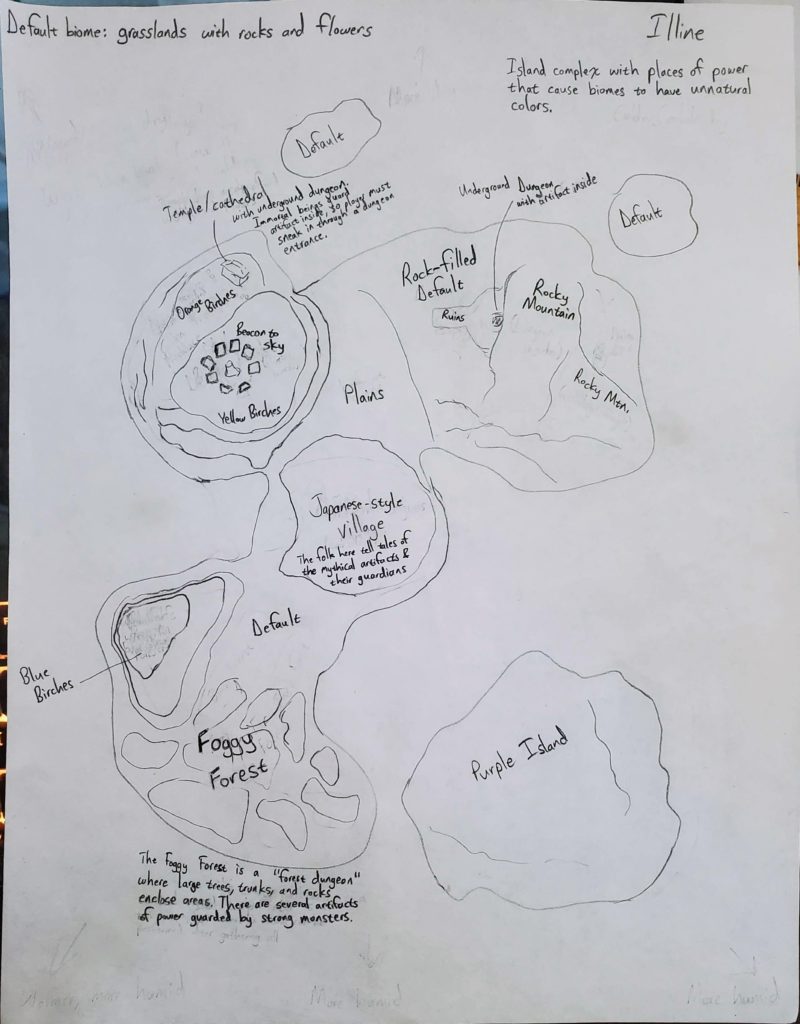
I used World Creator 2 to create the base terrain based on a paper sketch I made.
Biome Workflow
I approach the design of each biome with the following process:
1. Construct the story
The history and story behind the biome dictate the entire design. Without a history and story, the designer gets stuck asking questions such as, “I just made a forest. What do I do with it? How do I make it interesting?” When the story is present, the design flows and everything seems to fall into place.
2. Conceptualize the layout
This is the general layout that will drive the rest of the biome’s design. Since it is easier to iterate a concept than a 3D level, this stage saves a lot of time later and provides a guideline for the next step.
3. Create the blockout
Blocking out the biome’s areas and landmarks using primitives (spheres, cubes, etc.) is a fast way to iterate the look, feel, and mood without getting bogged down in details. This step is often combined with the previous since the blockout may reveal new information not foreseen during the concepting stage. My workflow is to use a few assets along with a spawning tool (usually Landscaper) to fill in the biome with just enough detail objects to not feel empty, and then create primitives for the landmarks and unique assets (Hero assets).
4. Replace primitives with landmarks, roads, and unique assets
After the biome’s areas and overall shape have been finalized from iterating the blockout, it is time to replace place the primitives with the landmarks, roads, and other unique assets (Hero assets) that define the gameplay elements of the biome.
5. Fill the biome
With the major assets in place and paths created to guide the player, the rest of the biome is ready to be filled with the remaining detail objects (filler trees, bushes, etc.). I prefer using area spawning tools for this step, which includes the aforementioned Landscaper.
6. Add variety and detail
The final step is to break up monotony. For example, a forest could have an area where there is a fallen tree or a large trunk resting on an upright tree. This detail pass is minute, but it is important for making the biome feel interesting instead of uninspired.
Scene Setup
Environment Lighting

Illine relies on ambient color instead of skybox lighting to achieve its stylized look.
The ambient lighting color is synced automatically to the time of day by Azure[Sky] Dynamic Skybox‘s sky controller, changing from white to yellow/orange to dark blue according to weather profile.
Stylized Nighttime Lighting
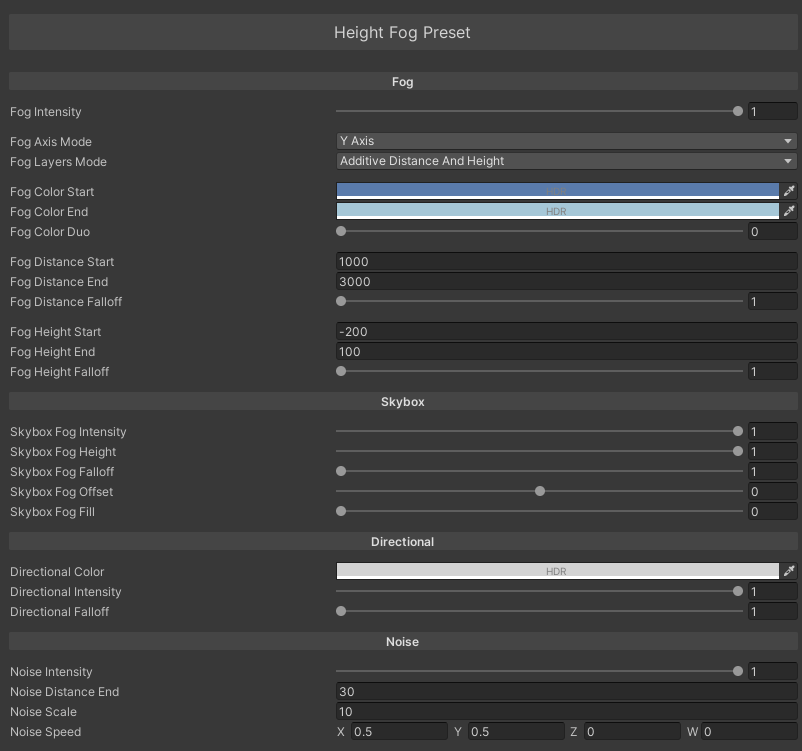
I wanted to avoid nighttime being realistically dark, so I decided on a foggy overcast look instead.

The main driver of the aesthetic is Azure[Sky] Dynamic Skybox‘s nighttime settings and Atmospheric Height Fog.
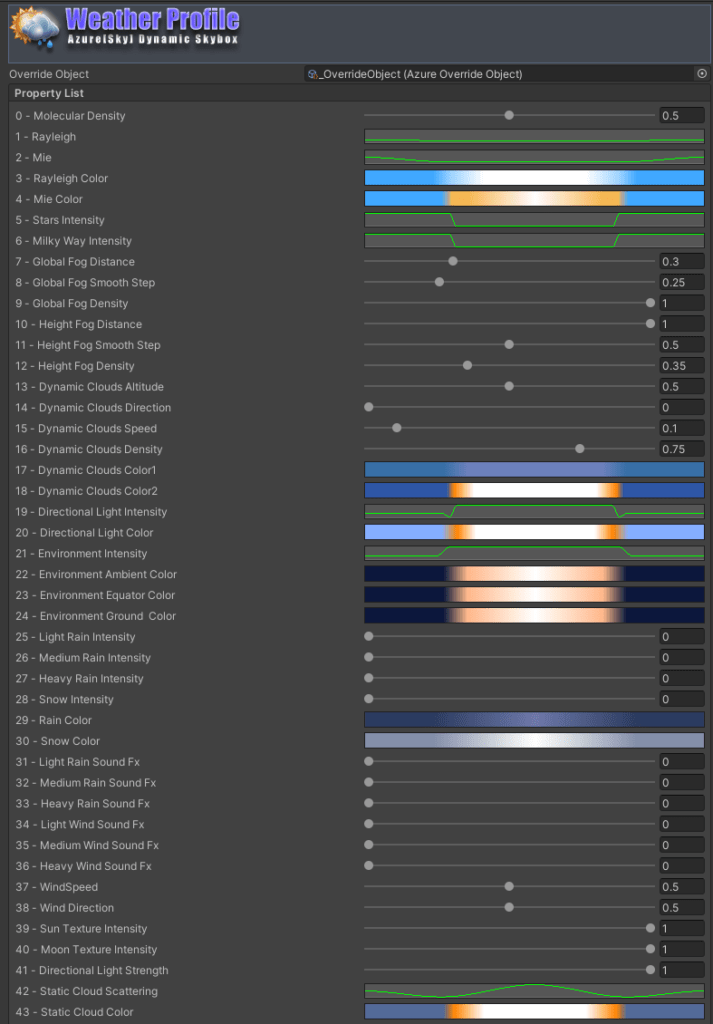
Disadvantages of Ambient Color Lighting
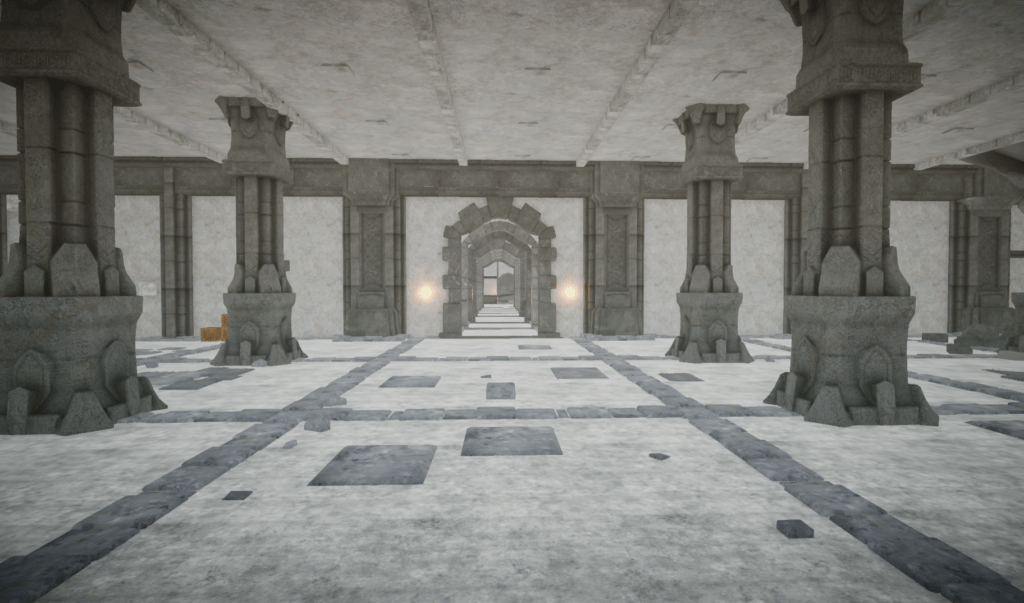
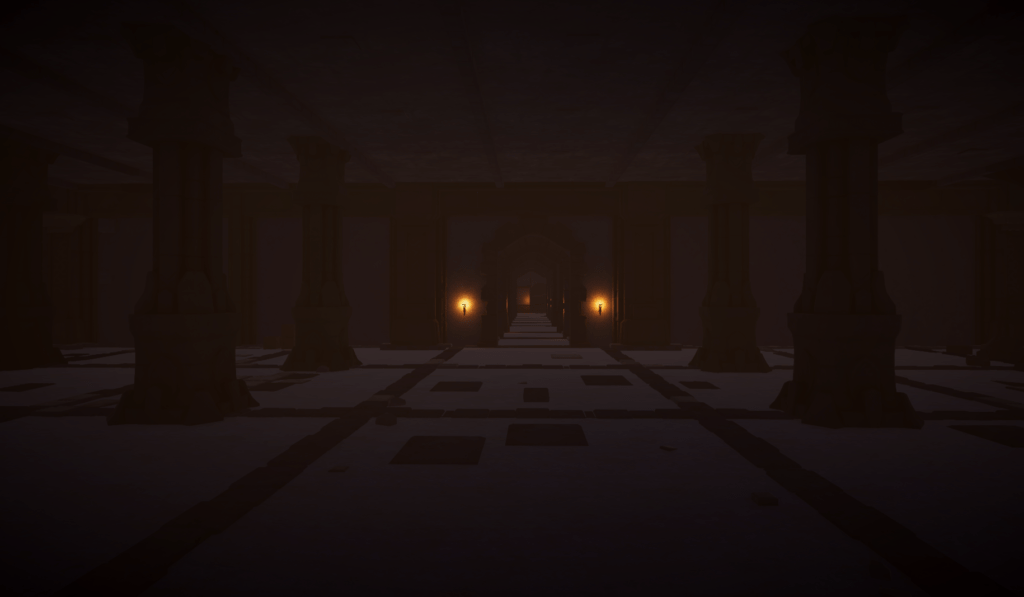
The primary downside to using ambient color lighting is having to “cheat” when entering dungeons, interiors, and underground areas, otherwise they will be unrealistically lit as if they were outdoors.
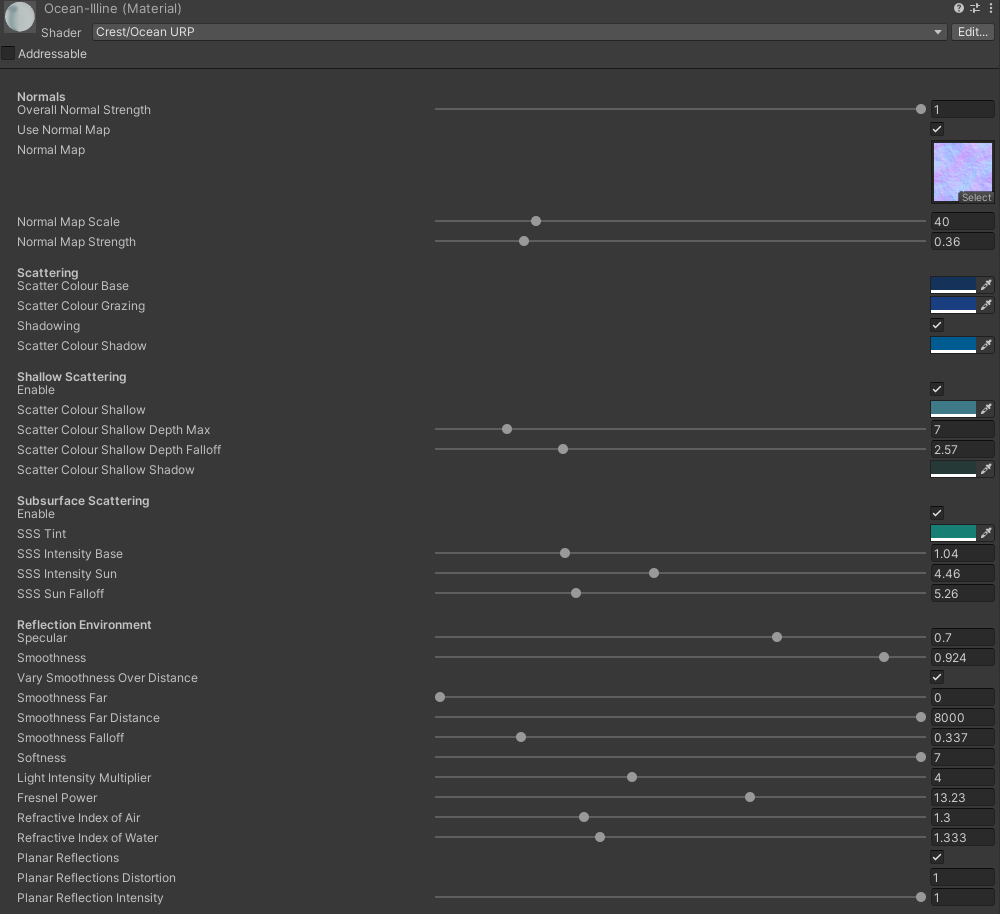
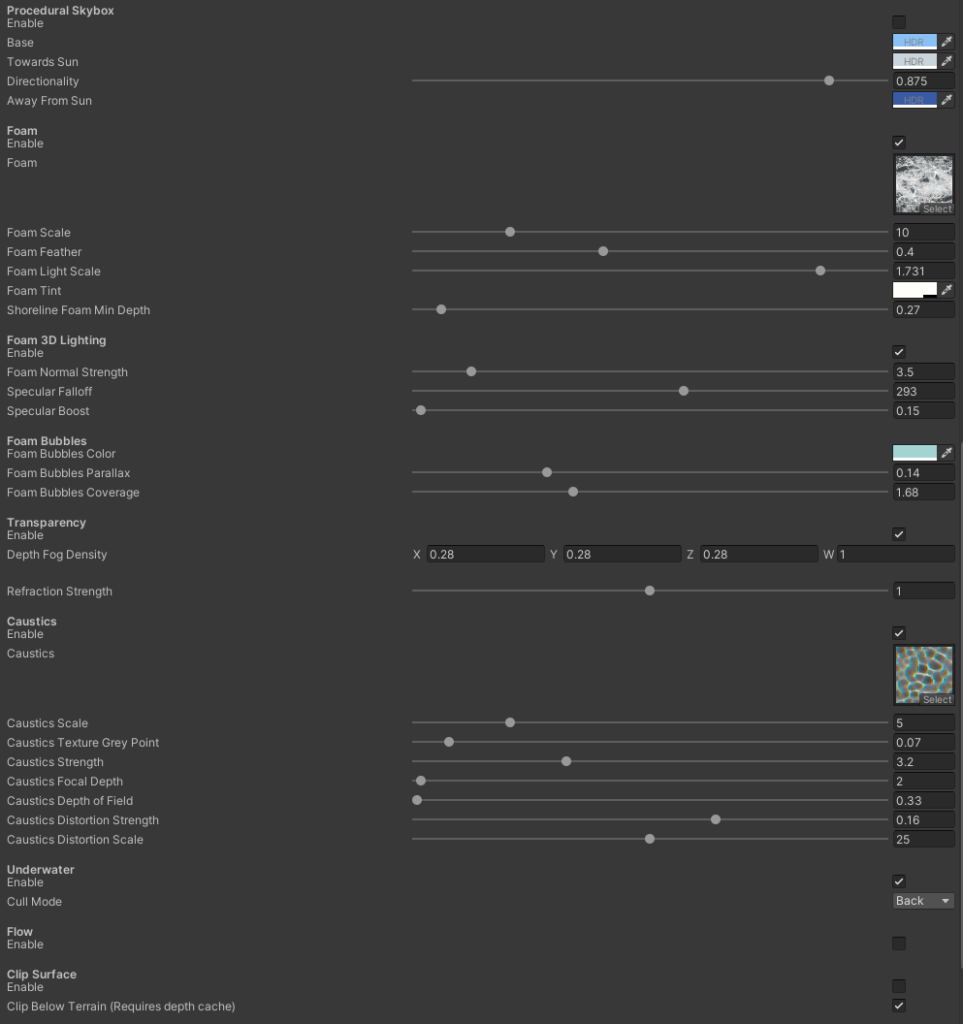
Crest Ocean Setup
URP Render Features
In order to make the environment assets work together, I modified the order in which each render feature executes.
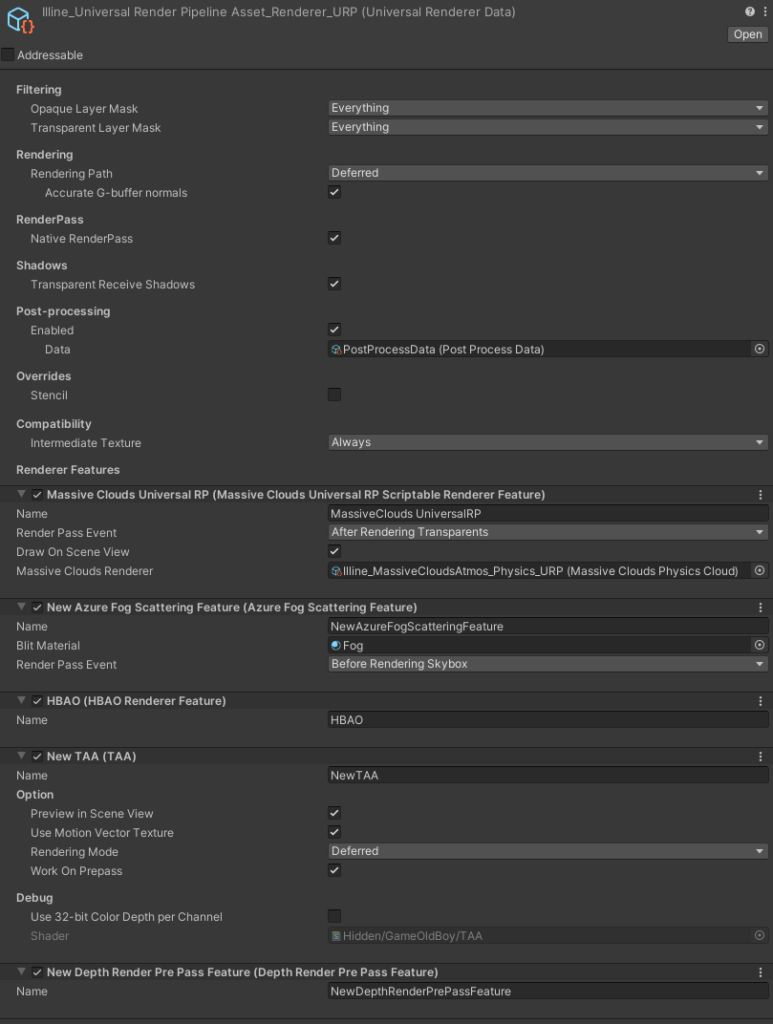
Most assets on the store are tested in isolation, so if you ever have issues mixing them then try modifying their render passes.
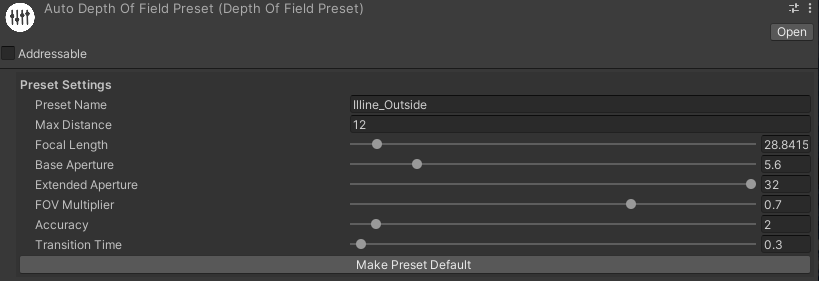
Physically Based Auto Depth of Field
This asset adds a slight focus to objects closer to the camera while automatically adjusting based on distance. In most cases, the effect is unnoticeable, but it’s a small touch that can make the player experience better. These are the settings I used:
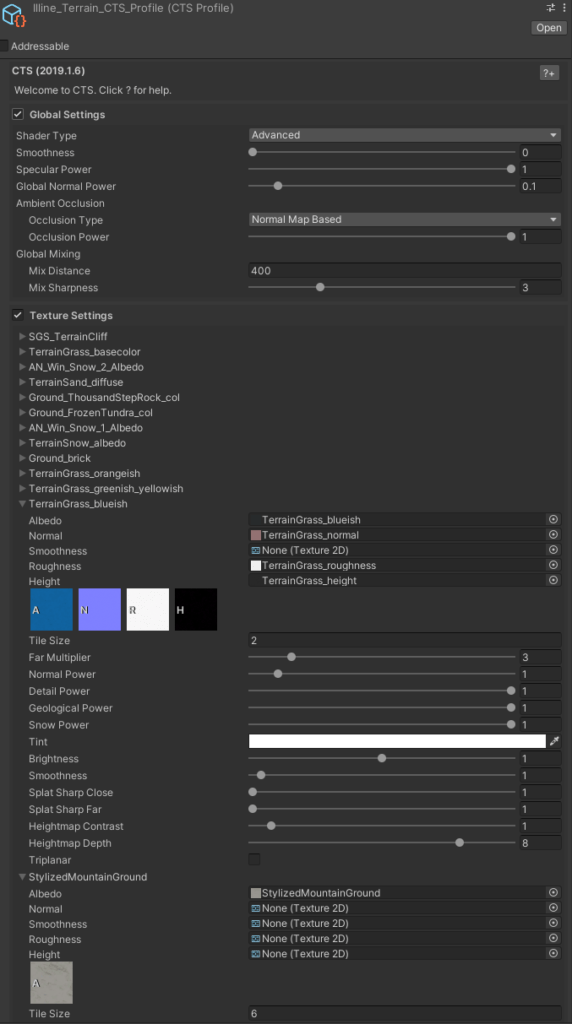
Terrain Shader
I used CTS 2019 for the terrain shader. It has since been deprecated. For future environments I plan on using Microsplat due to its extensive support and features, including the below-mentioned mesh blending with terrain capability that CTS lacks.
Most of my CTS settings are defaults, though the settings for each of the textures was tweaked to prevent a too-realistic look.
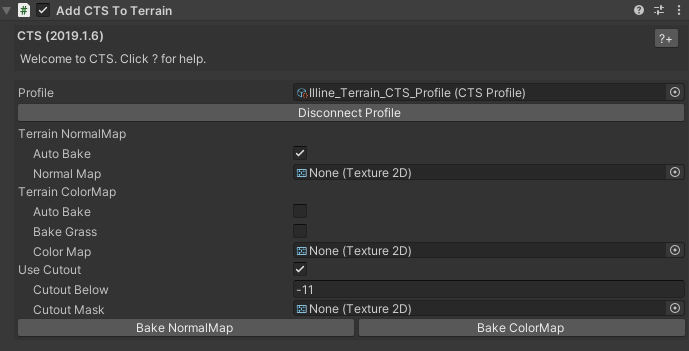
Illine features a dungeon that goes into/underneath a mountain, so the cutout feature is also used:
Assets Setup
Most assets require modification in order to work consistently with everything else in the environment. In this section, I go over the methods I use to integrate them within a scene.
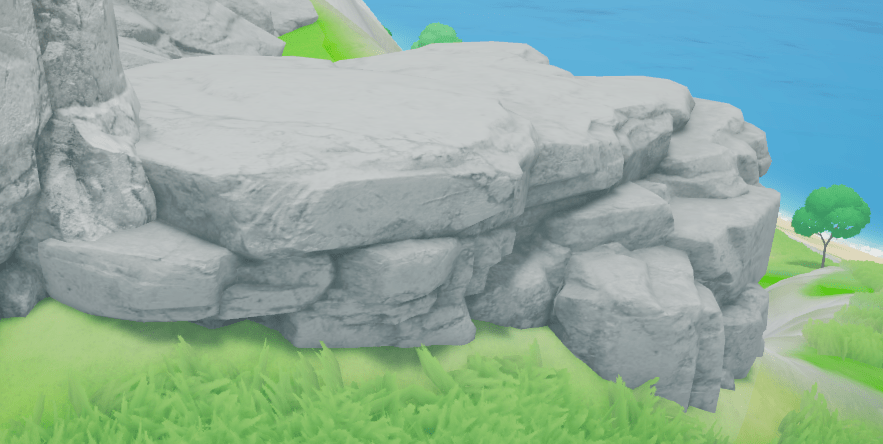
Manual Mesh Blending With Terrain
It’s unnatural for rocks to sit atop grass without some sort of blending. Since it isn’t a CTS feature to have mesh blending with terrain, I first tried to paint the intersections on each rock manually. I started with the built-in Polybrush, but it was limited to vertex painting that resulted in blobs for assets without high vertex density (like my rocks):
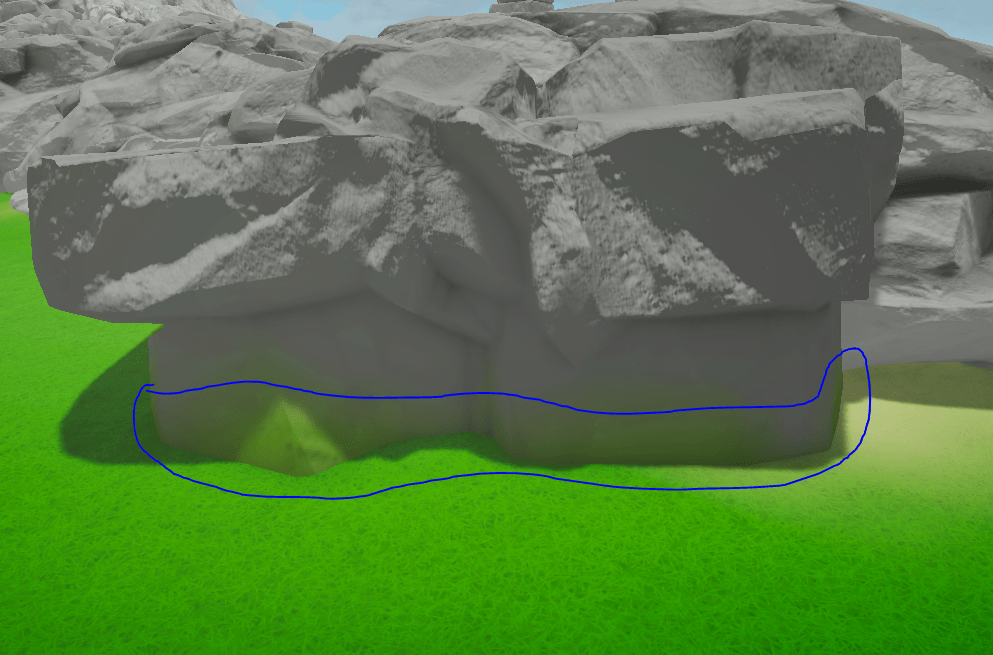
Note that the default Polybrush URP shader is extremely limited and only accepts albedo textures. I’ve created a custom version that supports normal maps and a single occlusion map. However, I wasn’t satisfied with the result, so I returned to the drawing board and examined how Genshin Impact dealt with this problem.
For my prefabs, I used Vegetation Studio Pro‘s vegetation mask area to create grass exclusion zones:
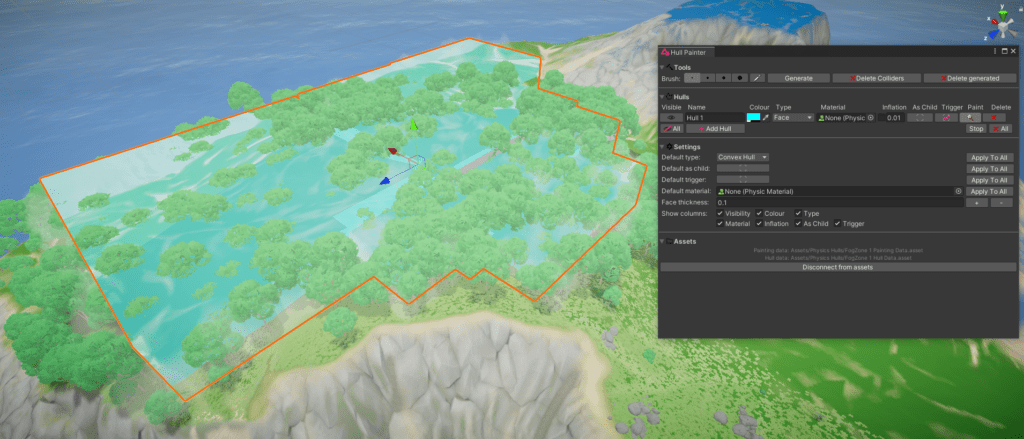
Creating Colliders
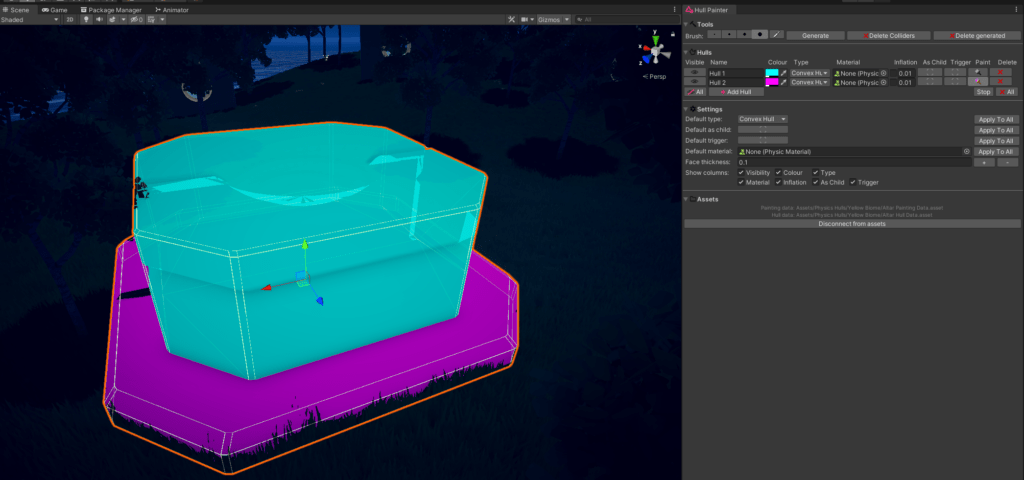
Unity makes it easy to create colliders for primitives, but more complex objects can take hours to set up. Thankfully, there is Technie Collider Creator that allows us to “paint” parts of an object and generate a collider for each section.
Super-Shaders
Most assets on the store use custom shaders that will eventually cause you to exceed the global shader keyword limit, not to mention have a headache trying to manage wind settings for each one. This is where super-shader assets save the day.
For skin / eye shaders, I prefer Human Shader Pack. One challenge with PBR characters is making them look consistent at nighttime and indoors. There are a number of ways to solve this, and the solution I chose was to utilize skin glow.
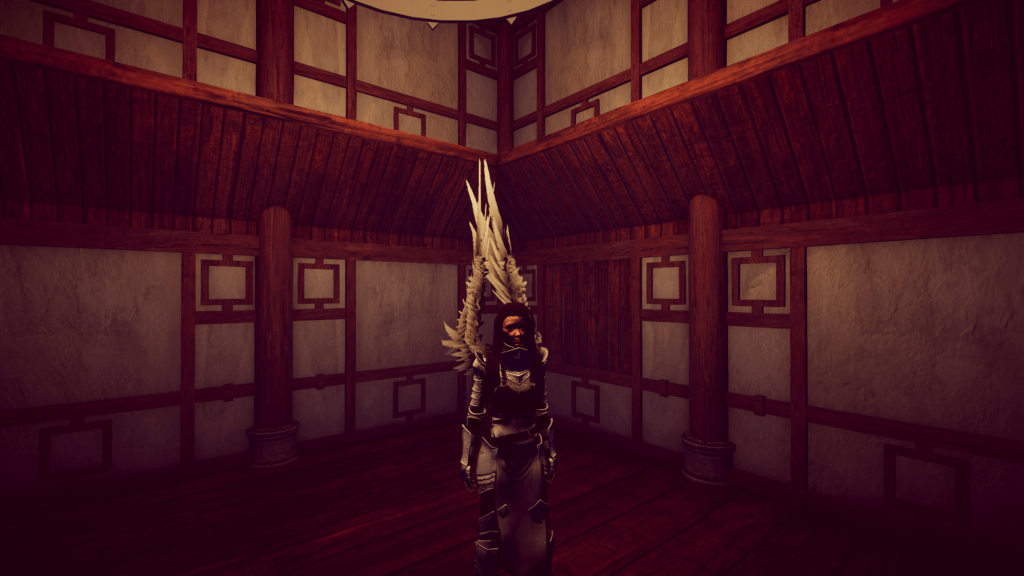
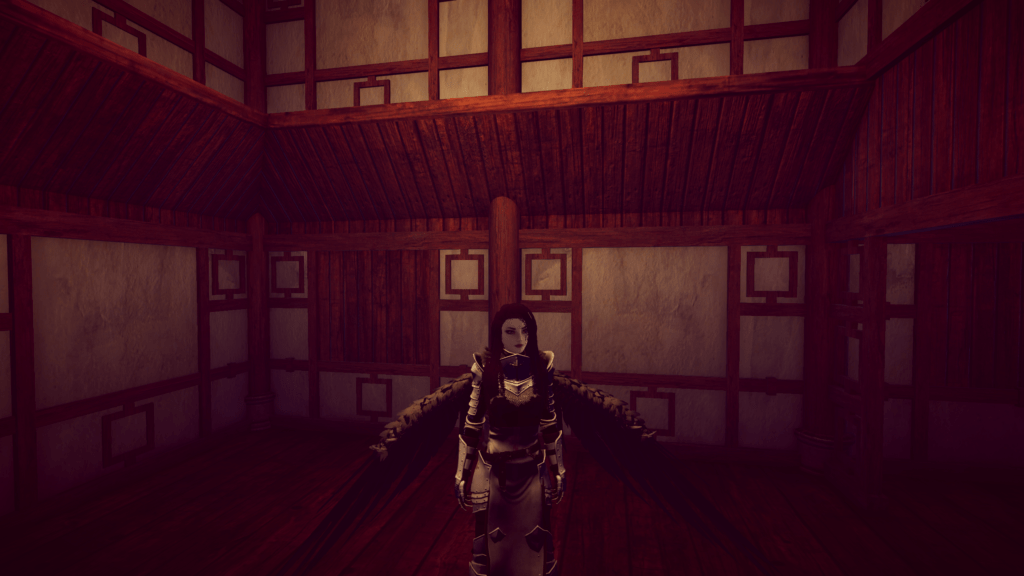
While not a super-shader, it is also important to have a universal IK system for characters. My personal preference is Final IK. It includes a Grounder solver for adapting character feet to the ground:
For all other objects, I highly recommend The Vegetation Engine. It’s the oldest super-shader on the asset store that supports all rendering pipelines (allowing me to purchase “HDRP Only” assets and use them in URP after conversion) and its Discord is filled with industry professionals who have tons of advice and critique to offer.
One thing to note: TVE is designed to be a generic super-shader across all rendering pipelines, so it utilizes transmission but not translucency for subsurface scattering. Since I wanted a stylized look, I modified the Leaf Subsurface Lit and Grass Subsurface Lit shaders to utilize translucency only:


The other advantage of using The Vegetation Engine is that it has an add-on for Amplify Imposters for easy imposter generation.
Distance Lights
Forward lighting is limited in the number of lights it can render at one time (URP Deferred was just released at the time I wrote this), which means I use light culling to stay within its constraints. Naturally, this leads to a problem where viewing a village from a distance means the lights disappear until the player gets close enough. To solve this, as well as add volume to my lights, I used Volumetric Lights.
For light culling, I wrote a basic script that disables a light beyond a set distance:
using UnityEngine;

public class DistanceBasedLightCuller : MonoBehaviour
{
    [SerializeField] private float availableDistance;
    [SerializeField] private float checkDistanceInterval;
    private GameObject _player;
    private Light _light;
    private float _distance;

    private void Start()
    {
        _player = GameObject.FindGameObjectWithTag("Player");
        _light = GetComponent<Light>();
        InvokeRepeating(nameof(LightCull), 0,checkDistanceInterval);
    }

    private void LightCull()
    {
        _distance = Vector3.Distance(_player.transform.position, transform.position);
        if (_distance < availableDistance)
        {
            _light.enabled = true;
        }

        if (_distance > availableDistance)
        {
            _light.enabled = false;
        }
    }
}
There may exist better solutions. If you know of one, please let me know!
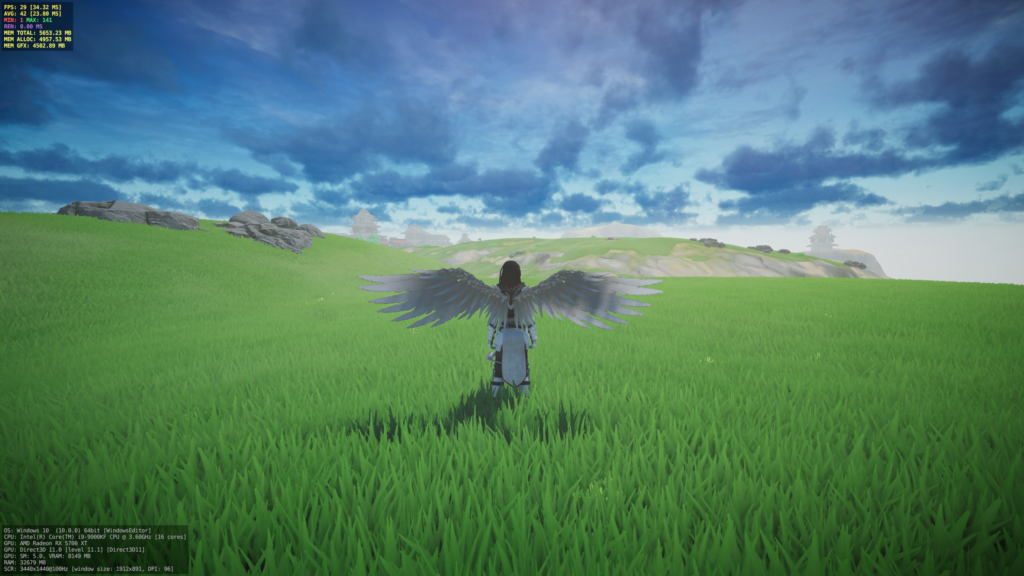
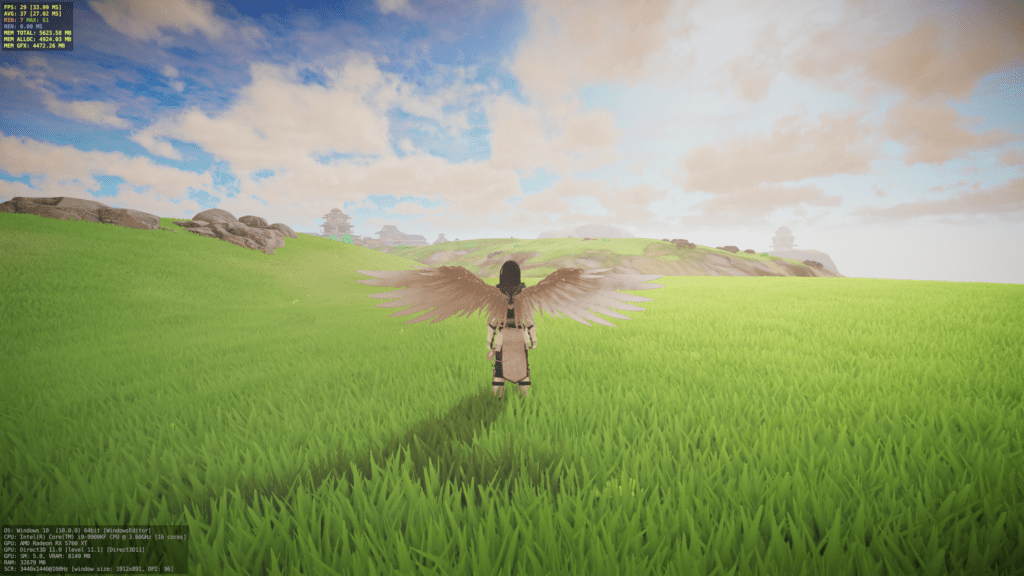
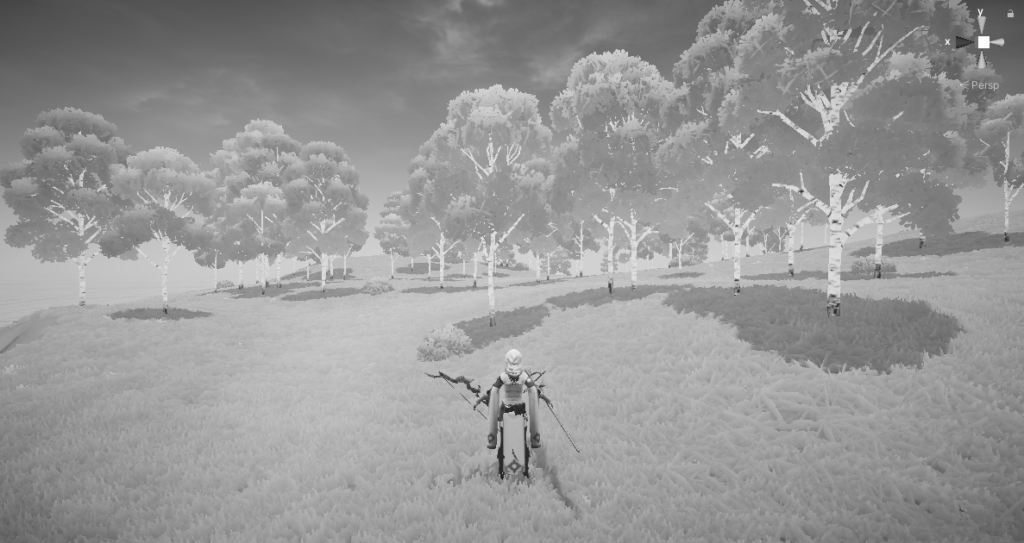
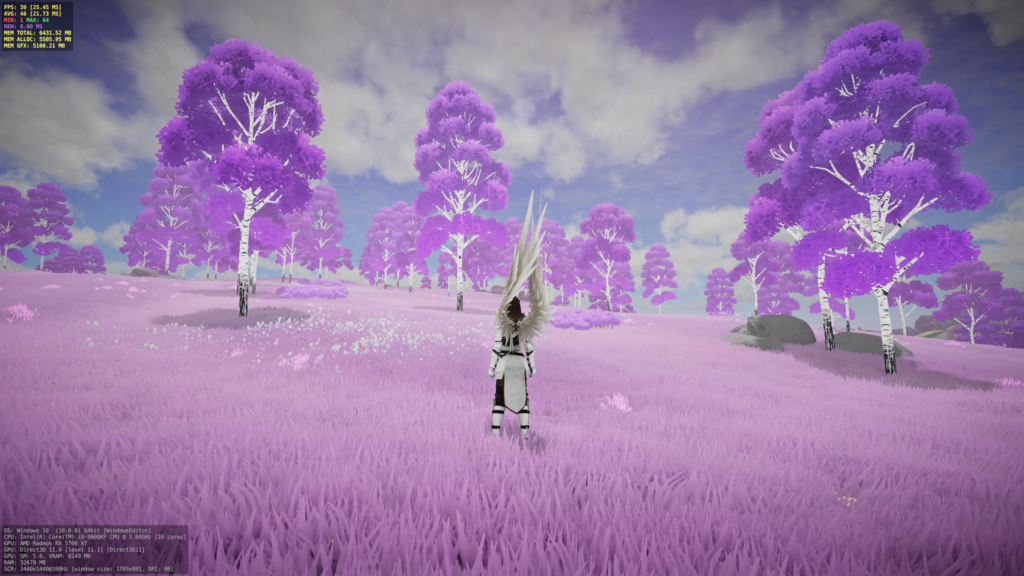
Contrast and Grayscale Testing
One challenge in asking for feedback on game environments is the disparity between the use-case and the feedback medium. When surveying a screenshot, viewers are offering critique on a static piece. However, game environments are alive and meant to be experienced for hours. It’s common for screenshot feedback to suggest the environment looks desaturated when the saturation level may actually be proper for gameplay.
As a rule of thumb, unimportant objects part of the environment should have the same contrast level. We can measure contrast levels in a scene by looking at grayscales.
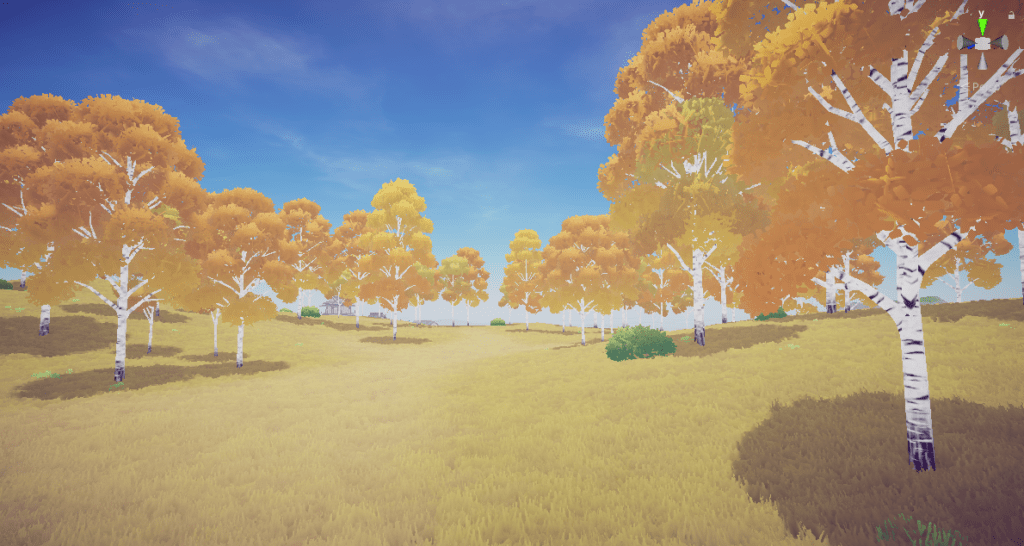
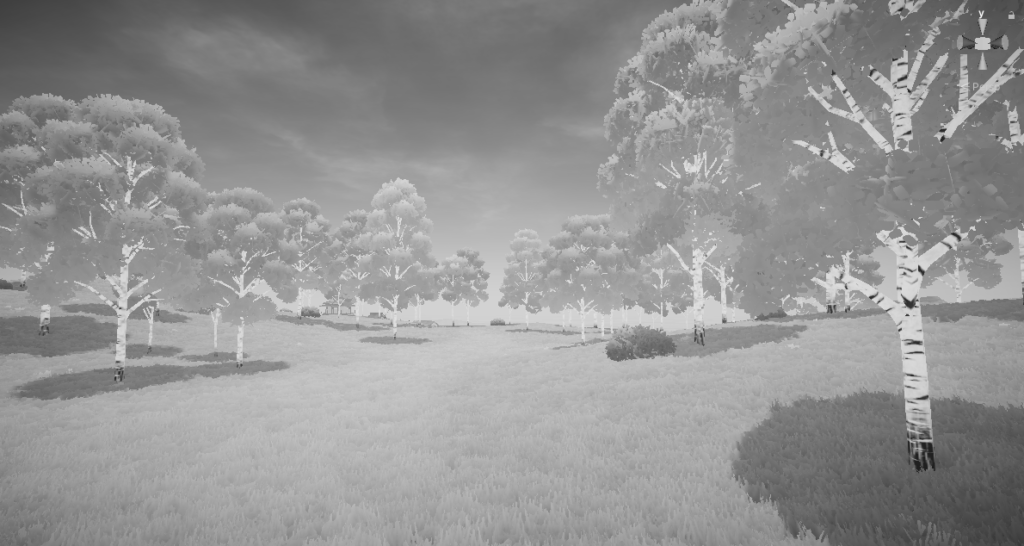
As you can see, the bushes stand out in the grayscale, indicating they need further color adjustments to match the contrast level of the rest of the foliage. In this case, the greenish yellow is too saturated, so we go for a weaker hue:
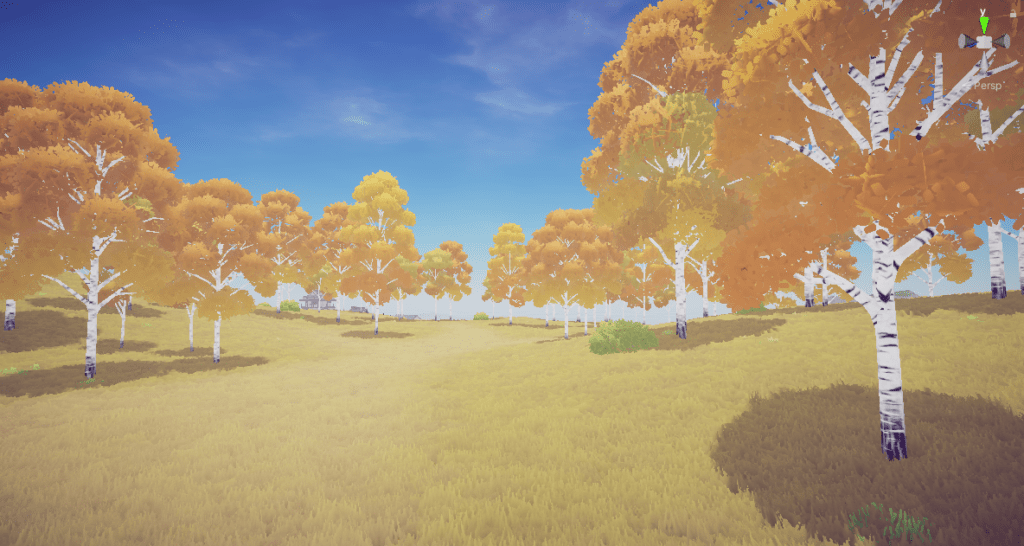
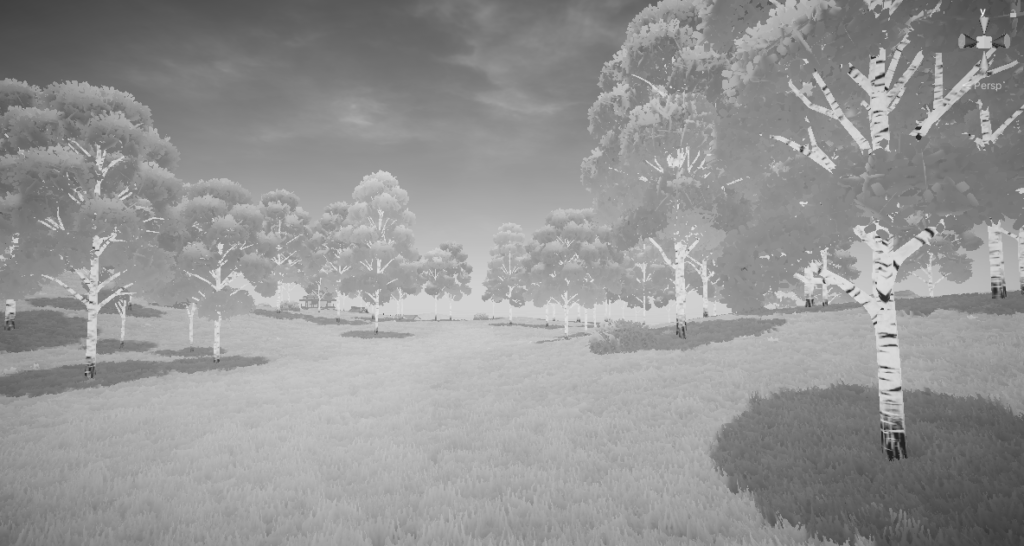
This is the level of environment contrast we’re looking for. Here is how it looks with a character:

(The sky system was in the beginning stages of setup when the above screenshots were taken.)
If you are on Windows 10, there is a hotkey to toggle grayscale after setting it up in the accessibility settings.
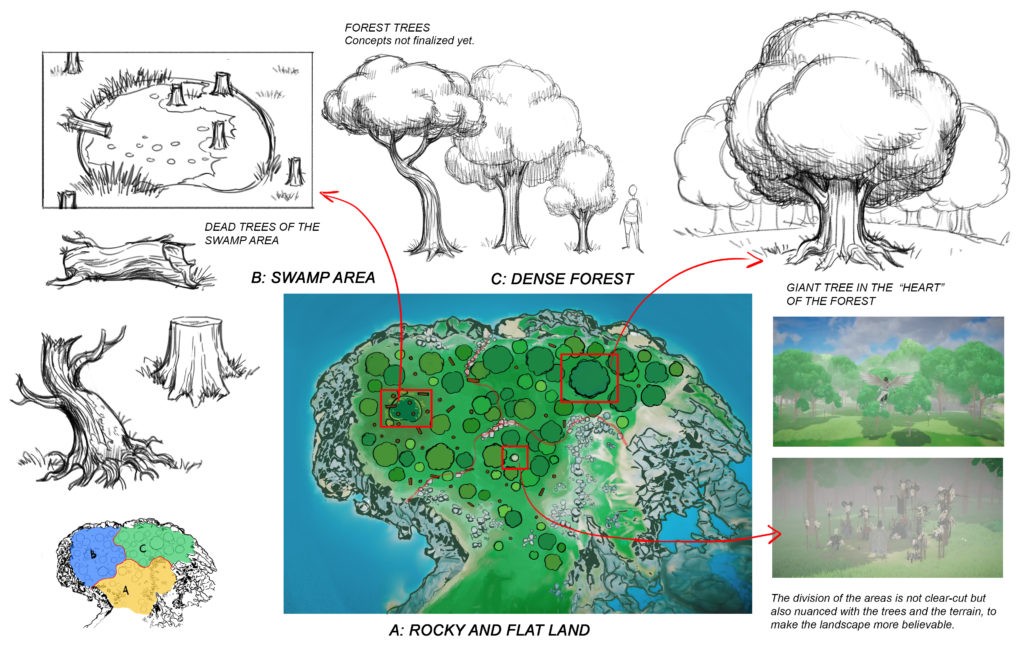
Creating the Haunted Forest
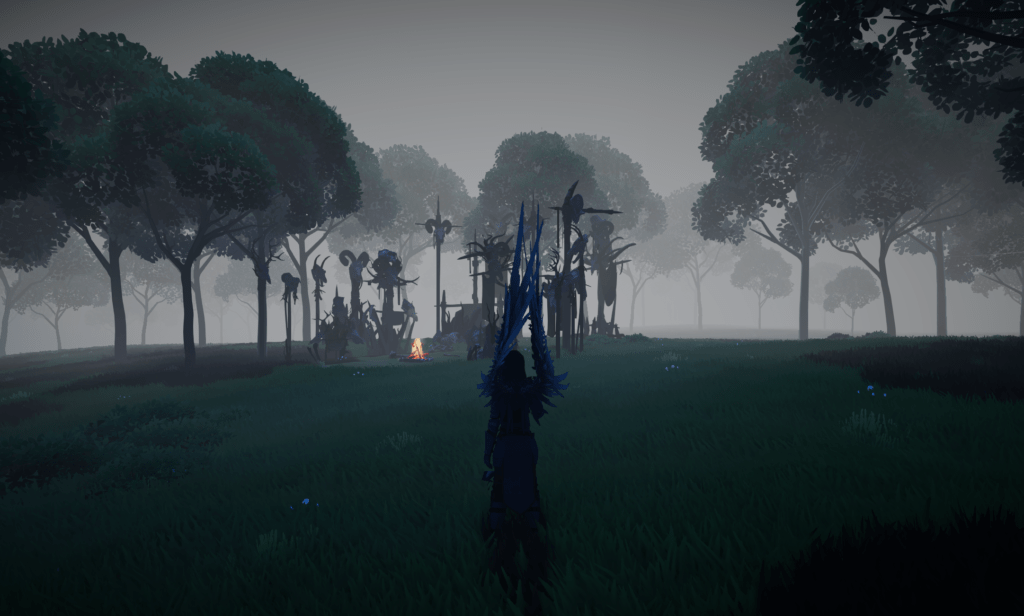
Most biomes in the project are fairly standard when it comes to environment design, but there is one I want to highlight due to its unique transition: The haunted forest that utilizes fog and sky effects to make it easy to get lost in and feel larger than it actually is.
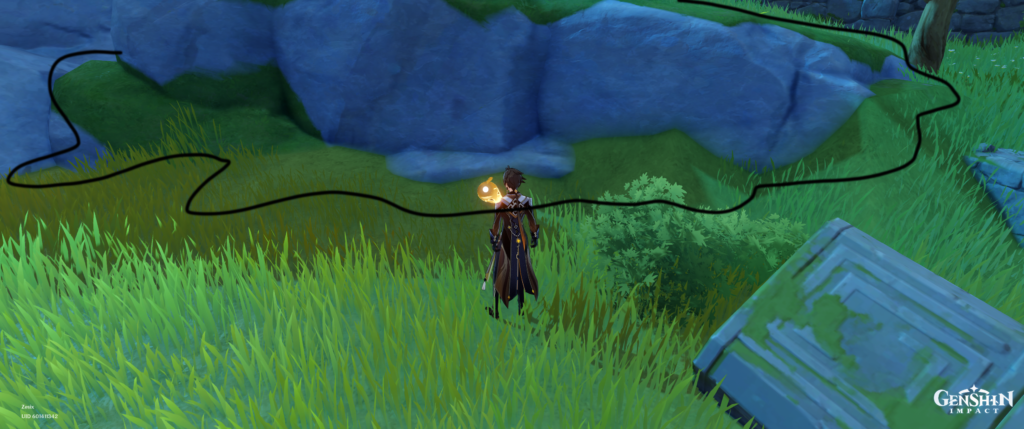
To make it clear the forest is haunted from the outside, I used Kronnect’s Volumetric Fog & Mist 2 to set up fog volumes:
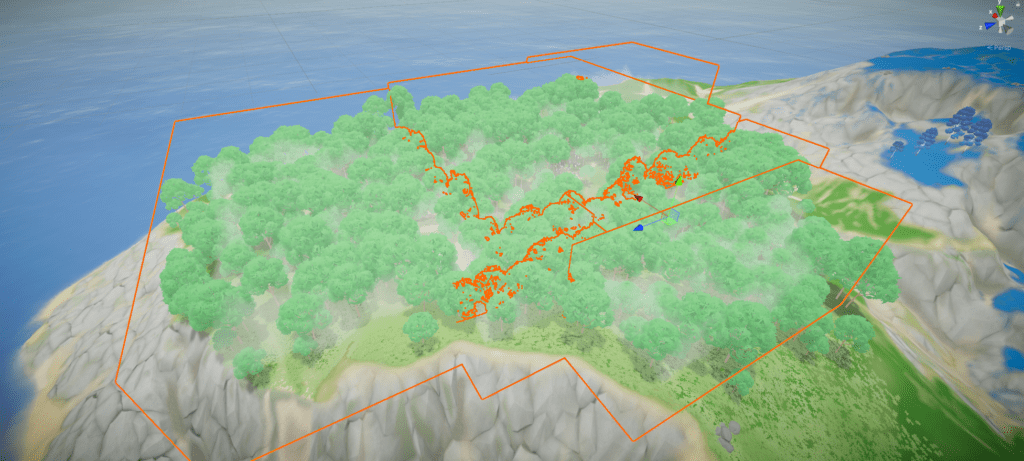
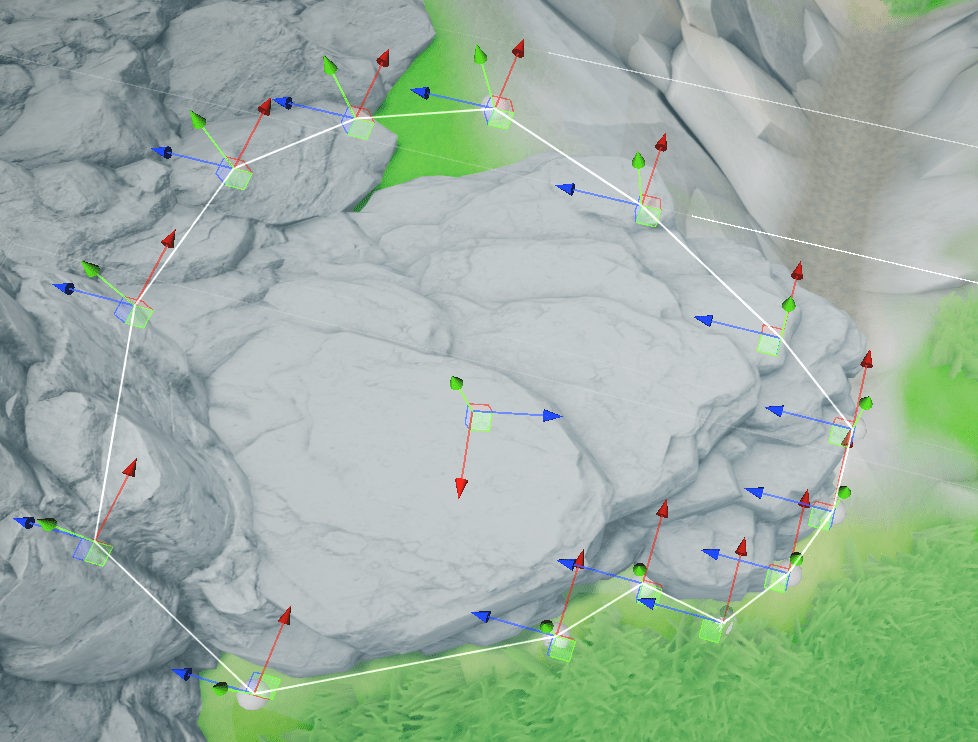
However, fog volumes are not enough to make the forest compellingly foggy once the player is inside. The sky needs to blend into an intense fog (without overriding existing weather like rain!) to compensate for the dynamic time of day. To do this, I first needed to create a trigger collider encasing the forest area. I started by making several default cubes to cover the general shape of the biome:
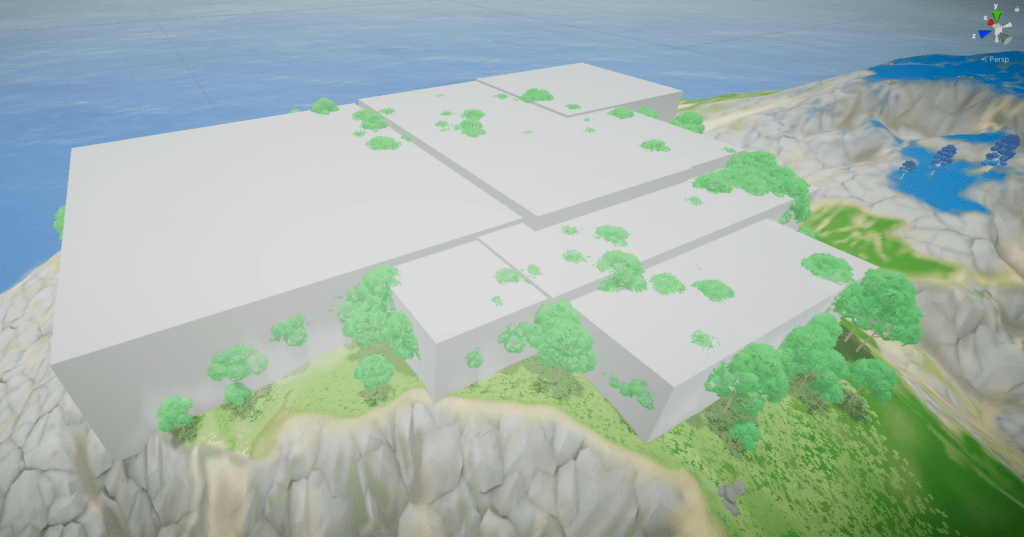
Using Mesh Baker, I combined these cubes into a single object, then used Technie Collider Creator to make a trigger mesh collider:
For the fog and sky transitions, I use a custom script that blends Azure[Sky] Dynamic Skybox‘s current weather with a heavy fog weather preset while increasing the Massive Clouds Atmos fog density. The final result:
Wrapping Up
There are two main reasons behind the poor performance in many of my screenshots in this article:
- URP deferred lighting was not available at the time.
- I failed to set up a streaming solution from the start because I did not possess the knowledge I do now.
Similar to refactoring a game to have multiplayer, it can be difficult to refactor all the assets in an existing open world project to be set up for streaming – these are architectures best established from the beginning.
However, the main reason for retiring this project is because I want to try again using HDRP. I believe HDRP is better suited for open world projects because it is not limited to lower-end hardware. Most mobile phone MMOs use extensive baking and other time-consuming optimizations to achieve acceptable performance, including my reference (Genshin Impact). Since I never intended to target mobile, it would have been better for me use HDRP from the start.
Another pain point in my workflow was Vegetation Studio Pro. For all its benefits, it comes with a restrictive workflow that forces all other assets integrate with it. In many ways I did not feel I was leveraging Unity’s strengths and spent considerable time debugging why some objects would render improperly with it. Moving forward, I plan to use a lighter solution such as Nature Renderer.
Lastly, since CTS is deprecated, the best terrain shader available now is MicroSplat. Its support is extensive and it also includes a mesh blending with terrain feature, which I find lacking in most terrain shaders on the store. In addition, open world development tools in Unity have gotten stronger with Gaia Pro and Gena Pro, both by Procedural Worlds. The former leverages Unity’s strengths plus includes terrain chunking and streaming, while the latter is perhaps the most powerful level design tool ever created for this game engine. Moving forward, I plan on utilizing these to improve my workflow considerably.